|
•
|
<Tab> - Indent/Block Indent. Press <Tab> to indent lines of text. If more than one line is selected, than all selected lines will be indented together (block indent).
|
|
•
|
<Shift+Tab> - Unindent/Block Unindent. Press to unindent lines of text. For single line unindent, position the text cursor at the beginning of the line and press <Shift+Tab>. To unindent multiple lines of text (block unindent), simply highlight the lines that should be unindented and press <Shift+Tab>
|
|
•
|
<Alt+Up> - Move Selected Lines Up.
|
|
•
|
<Alt+Down> - Move Selected Lines Down.
|
|
•
|
<Ctrl+L> - Delete Selected Lines.
|
|
•
|
<Ctrl+Alt> - Column selection. Hold this key combination while selecting text and it will produce multiple column-aligned selections which can be copy and pasted.
|
The user can toggle DirectWrite at any time by using the Code Font Selection dialog available in the global File menu (File | Set Code Font...). On the bottom-right of the dialog box is a check box titled "Enable DirectWrite" which you may select/unselect.
If auto indent is turned on (Options | Auto Indent), the text insertion point will automatically indent to match the prior line when you hit Enter. If the prior line ended with a right bracket, the new line will indent one extra tab automatically (as is the norm for Smalltalk syntax).
Bracket Highlighting is the use of stylization to indicate matching pairs of ()[]{} enclosure characters. This feature is activated when the text cursor is positioned next to any of these characters and allows the user to quickly identify the start and end of enclosed expressions or blocks.
Bracket Highlighting may be quickly enabled/disabled by checking/unchecking the following menu item from any browser's Option menu (Options | Code Assist | Bracket Highlight)
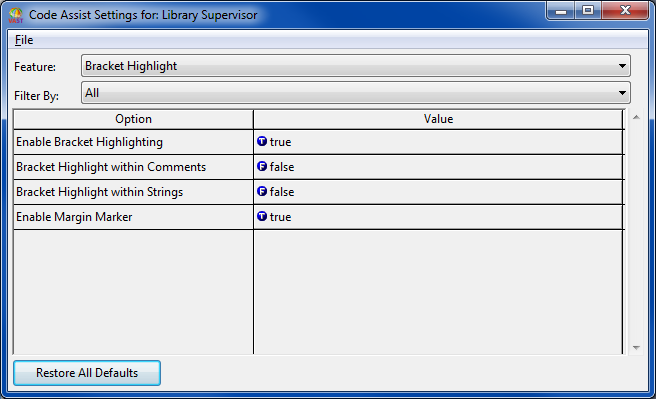
Bracket Highlighting configuration options can be accessed by (Options | Code Assist | Configure...) in any browser menu and selecting "Bracket Highlight" from the Feature combo box in the Configuration UI.
|
•
|
Enable Bracket Highlighting - Enable/Disable bracket highlighting in the global development environment.
|
Default: true
|
•
|
Bracket Highlight within Comments - Enable/Disable bracket highlighting within comments.
|
Default: false
|
•
|
Bracket Highlight within Strings - Enable/Disable bracket highlighting within comments.
|
Default: false
|
•
|
Enable Margin Marker - Enable/Disable margin marker to help show the location of offscreen matches.
|
Default: true
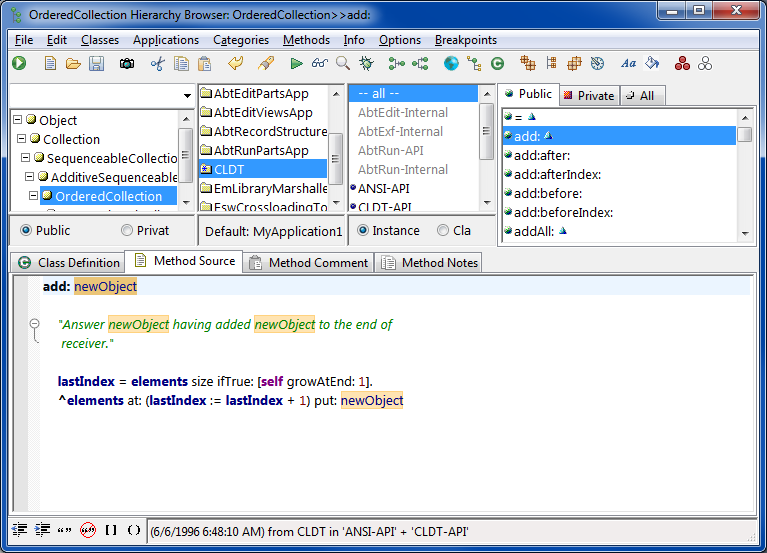
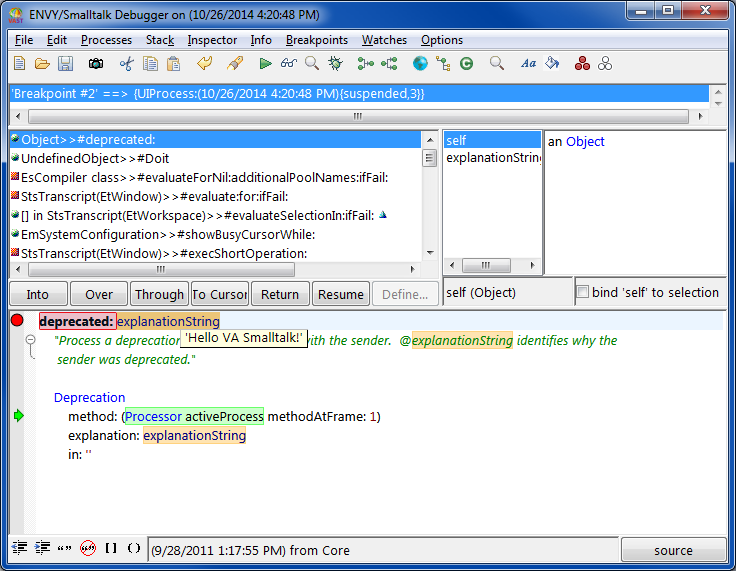
Smart Highlighting may be quickly enabled/disabled by checking/unchecking the following menu item from any browser's Option menu (Options | Code Assist | Smart Highlight)
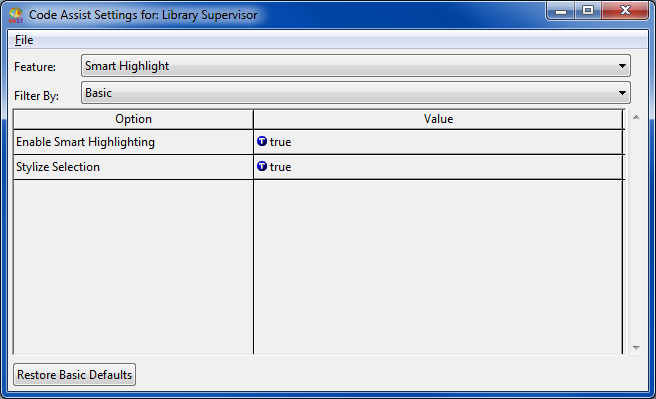
Smart Highlighting configuration options can be accessed by (Options | Code Assist | Configure...) in any browser menu and selecting "Smart Highlight" from the Feature combo box in the Configuration UI.
|
•
|
Enable Smart Highlighting - Enable/Disable smart highlighting in the global development environment.
|
Default: true
|
•
|
Stylize Selection - Apply stylization to the selected word, in addition to matched words. By default this is set to false which means that the selected word will retain the normal text selection color.
|
Default: false
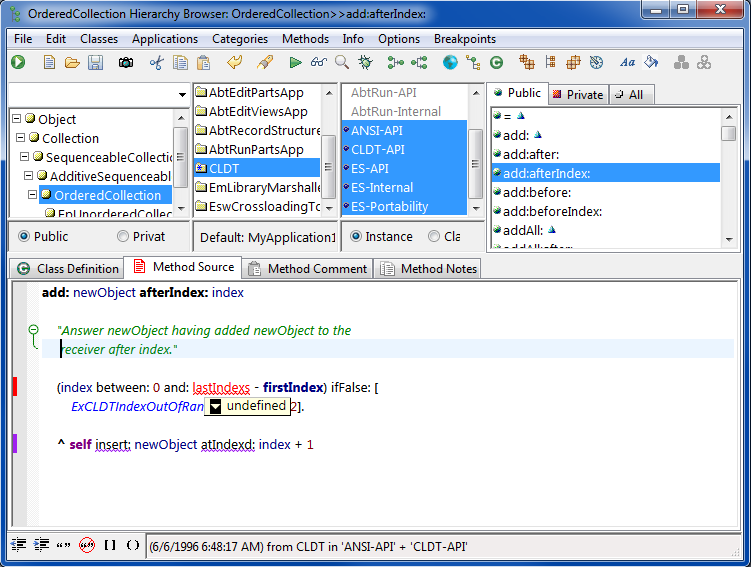
In some contexts, call tips will be displayed which the user can interact with and provide input to. These are called Action List Call Tips. These are call tips that start out in a collapsed state, where they display a brief message to the user like traditional call tips do. However, there will be a down arrow button on the edge that, once pressed, will expand to produce a list of items from which the user can select. (as shown above).
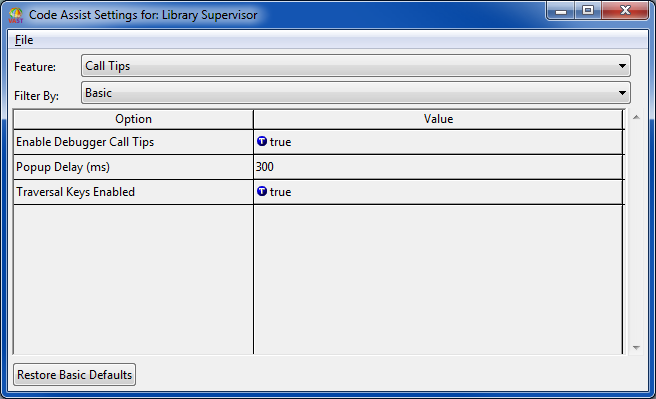
Call Tips configuration options can be accessed by (Options | Code Assist | Configure...) in any browser menu and selecting "Call Tips" from the Feature combo box in the Configuration UI.
|
•
|
Enable Debugger Call Tips - Enable/Disable call tips in the global development environment. If enabled, call tips will be available during debugging sessions.
|
Default: true
|
•
|
Popup Delay (ms) - Once the mouse cursor is positioned over a call tip region, this option defines the number of milliseconds to wait before call tips will show.
|
Default: 300
|
•
|
Traversal Keys Enabled - Used for action list calltips that mimic list widgets. If this is enabled, the the up/down arrows on the keyboard can be used to change the selected item within the calltip list. Pressing <Enter> will apply the selected item.
|
Default: true
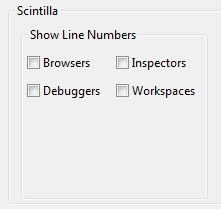
To enable/disable line numbers for one or more of the window types listed above, open the VA Assist Pro Setup dialog available from the Transcript's Tools menu (Tools | VA Assist Pro | Setup) and select the "General" tab. In the Scintilla section the user will find a sub-section named "Show Line Numbers". From this sub-section the user can specify the various window types that should show line numbers. Once an item is checked, the change will take place immediately.
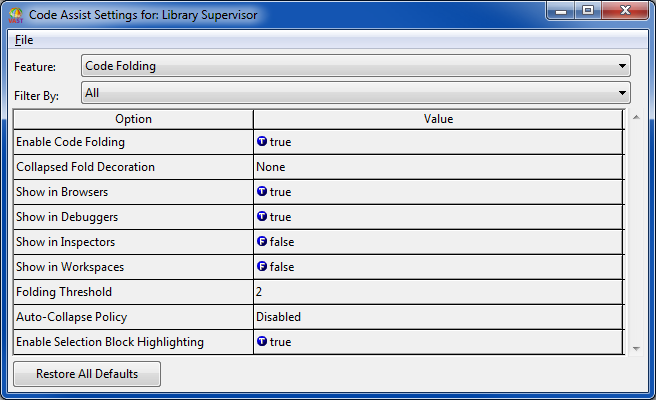
A special margin, called the folding margin, exists on the left part of the editor. This margin shows a series of markers to indicate if the comment is expanded or collapsed. Code Folding may be quickly enabled/disabled by checking/unchecking the following menu item from any browser's Option menu (Options | Code Assist | Code Folding)
Code Folding configuration options can be accessed by (Options | Code Assist | Configure...) in any browser menu and selecting "Code Folding" from the Feature combo box in the Configuration UI.
|
•
|
Enable Code Folding - Enable/Disable code folding within the environment.
|
Default: true
|
•
|
Collapsed Fold Decoration - Visual indication used for folding areas that have been collapsed.
|
Default: None
|
•
|
Show in Browsers - Show/Hide in the browsers if code folding is enabled.
|
Default: true
|
•
|
Show in Debuggers - Show/Hide in the debuggers if code folding is enabled.
|
Default: true
|
•
|
Show in Inspectors - Show/Hide in the inspectors if code folding is enabled.
|
Default: false
|
•
|
Show in Workspaces - Show/Hide in the workspaces if code folding is enabled.
|
Default: false
|
•
|
Folding Threshold - The number of lines in a multiline comment before folding will be applied. A threshold of 2 means all multiline comments will have folding applied.
|
Default: 2
|
•
|
Auto-Collapse Policy - Policy to control which foldable comments are automatically collapsed when new content loads.
|
Default: Disabled
|
•
|
Enable Selection Block Highlighting - Enable highlighting in the margin of the selected fold block.
|
Default: true
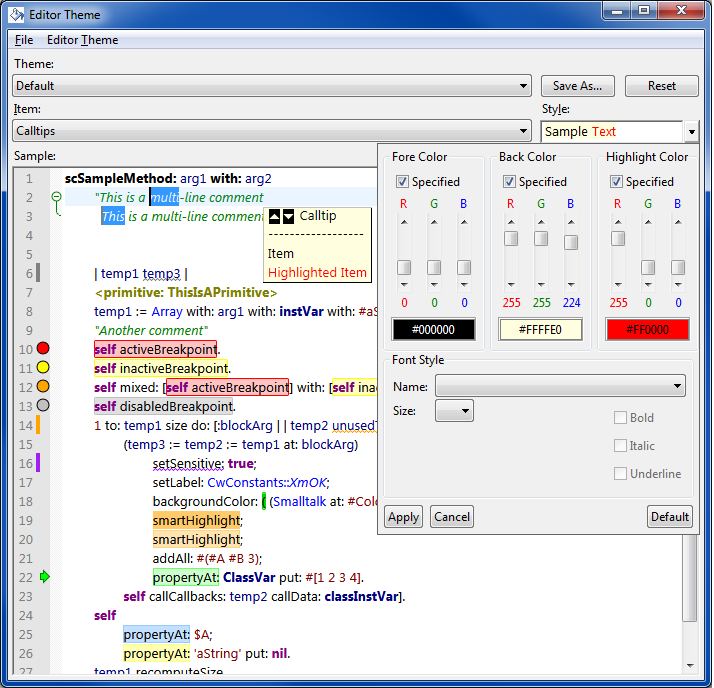
In order to facilitate the creation and modification of themes, a UI is available that allows the user to tweak any available theme setting. This UI can be accessed from the Options menu of any browser (Options | Editor Theme | Configure...).
There are a number of predefined themes to choose from. Once the Editor Theme UI is open, just change the theme from the Theme combobox. To make your own themes, simply choose one of the predefined themes, make your style changes, and press the Save As... button (to the right of the Theme combobox). This will allow you to name and save your new theme.
There are a large number of theme Items available. While you can look through all the choices from the Items combobox, it is far simpler to simply click on the visual item you wish to modify inside the sample editor. Doing so will automatically select it from the Items combobox.
Once an item is chosen, you will see a preview of it in the Style section of the UI (Below the Save As... and Reset button). Within this section is a dropdown arrow, that when clicked, will display a style customization panel that is unique to the chosen item. Depending on the item, you can tweak styles like foreground and background colors, fonts names and sizes and various transparency settings. The preview within the Style section will constantly update to show you what impact your setting changes are having.
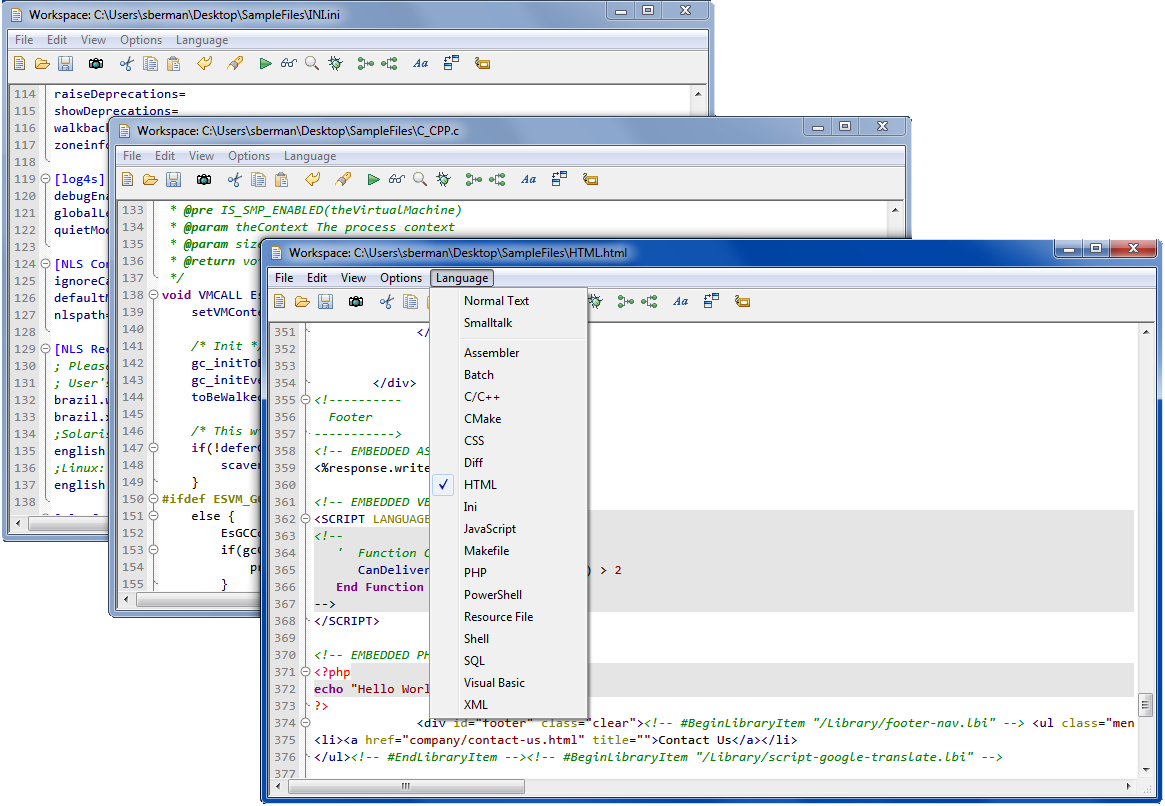
When a workspace is opened, there will be a new menu called Language available in the menu bar. The Language menu shows the different language modes the workspace is capable of. The current language mode will have a checkmark next to the menu item.
To switch the editor into a new language mode, simply select one of the language menu items in the Language menu.
Opening a new workspace will default to using the Smalltalk language mode. Opening a new file in a workspace will use the language mode that is dynamically determined by the filename. If a language mode could not be identified from the filename, then the Normal Text language mode is selected.
