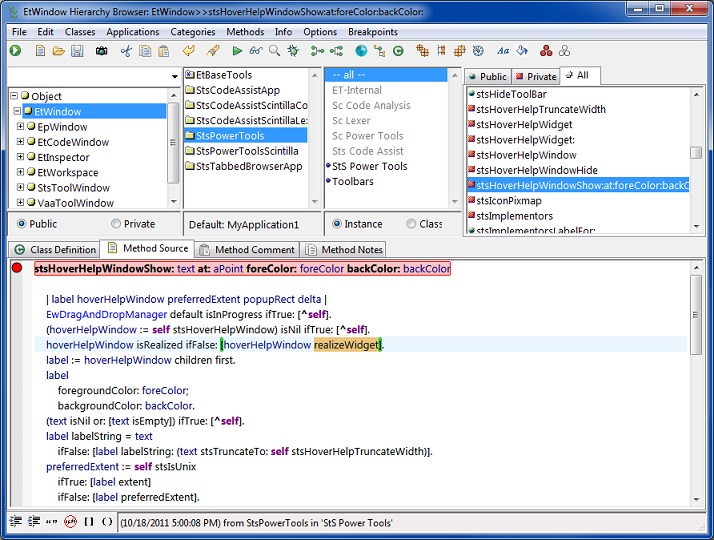
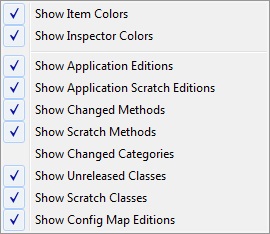
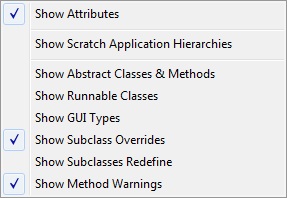
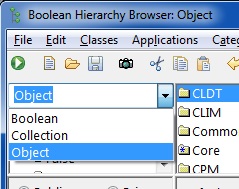
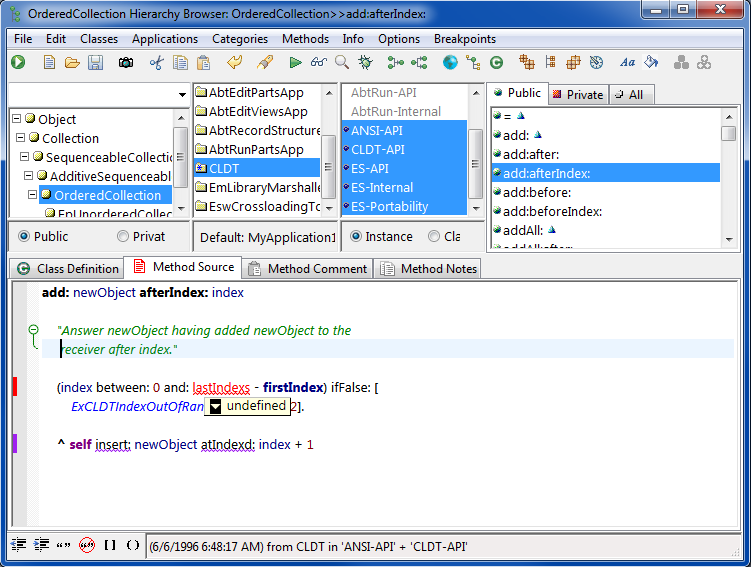
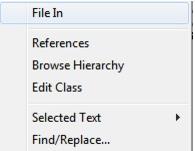
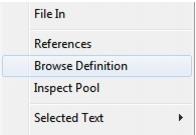
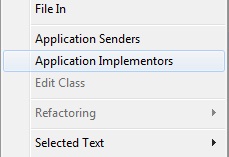
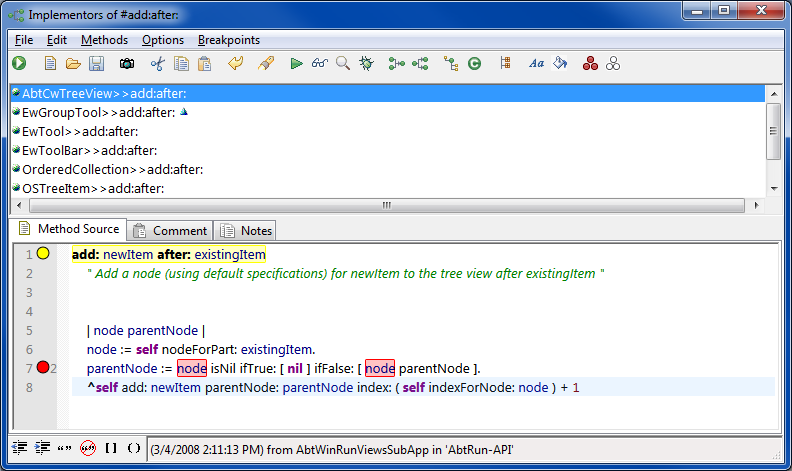
Use of color to indicate changed or scratch editions. Unversioned classes and applications are displayed in blue as are any methods that are new to those classes. Scratch applications and any classes or methods that have been changed within them are displayed in red.
Empty categories and hidden classes are grayed out.
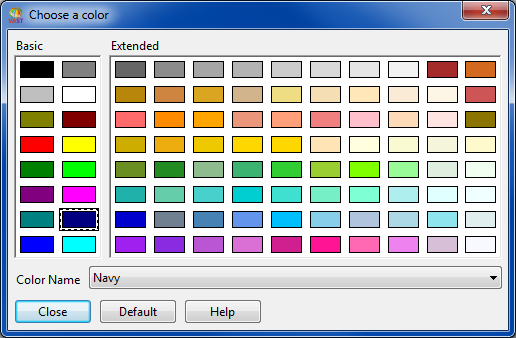
The background color of the enhanced lists may be controlled via the (Options | Enhanced List Widgets | Set List Background Color) command.
Hover help expansion of list elements in the enhanced lists may be controlled via the (Options | Enhanced List Widgets | Show Hover Help) command.
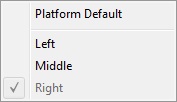
The drag drop button may be configured to be either the left, right or center mouse button via the (Options | Enhanced List Widget | Drag Drop Mouse Button) menu.
The drag/drop feature can be turned on and off via the (Options | Drag Drop) command. If drag drop is turned on and the drag drop mouse button is set to the left mouse button, drag/drop will interfere with the ability to drag select multiple items in the various browser lists. This option allows the user to quickly toggle drag/drop on and off. If the drag drop mouse button is set to the right mouse button, there is no conflict and drag/drop may be left on permanently.
|
•
|
<Tab> - Indent/Block Indent. Press <Tab> to indent lines of text. If more than one line is selected, than all selected lines will be indented together (block indent).
|
|
•
|
<Shift+Tab> - Unindent/Block Unindent. Press to unindent lines of text. For single line unindent, position the text cursor at the beginning of the line and press <Shift+Tab>. To unindent multiple lines of text (block unindent), simply highlight the lines that should be unindented and press <Shift+Tab>
|
|
•
|
<Alt+Up> - Move Selected Lines Up.
|
|
•
|
<Alt+Down> - Move Selected Lines Down.
|
|
•
|
<Ctrl+L> - Delete Selected Lines.
|
|
•
|
<Ctrl+Alt> - Column selection. Hold this key combination while selecting text and it will produce multiple column-aligned selections which can be copy and pasted.
|
The user can toggle DirectWrite at any time by using the Code Font Selection dialog available in the global File menu (File | Set Code Font...). On the bottom-right of the dialog box is a check box titled "Enable DirectWrite" which you may select/unselect.
If auto indent is turned on (Options | Auto Indent), the text insertion point will automatically indent to match the prior line when you hit Enter. If the prior line ended with a right bracket, the new line will indent one extra tab automatically (as is the norm for Smalltalk syntax).
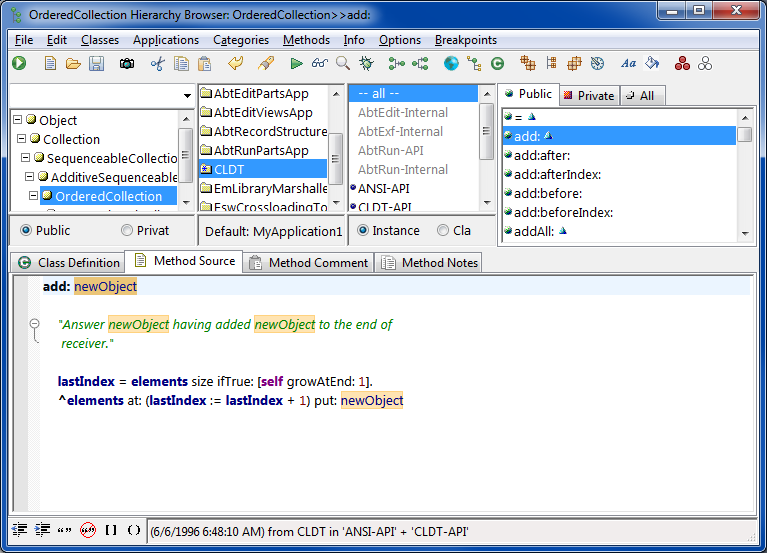
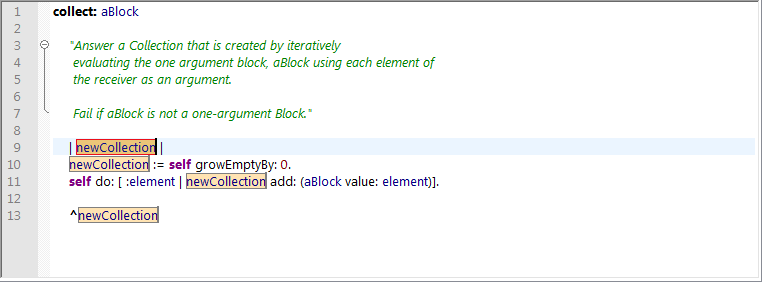
Bracket Highlighting is the use of stylization to indicate matching pairs of ()[]{} enclosure characters. This feature is activated when the text cursor is positioned next to any of these characters and allows the user to quickly identify the start and end of enclosed expressions or blocks.
Bracket Highlighting may be quickly enabled/disabled by checking/unchecking the following menu item from any browser's Option menu (Options | Code Assist | Bracket Highlight)
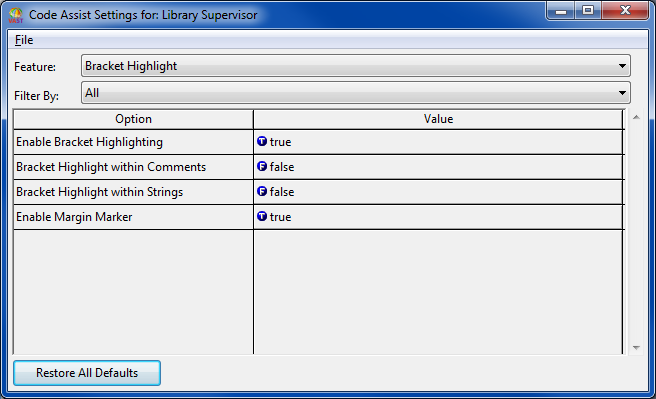
Bracket Highlighting configuration options can be accessed by (Options | Code Assist | Configure...) in any browser menu and selecting "Bracket Highlight" from the Feature combo box in the Configuration UI.
|
•
|
Enable Bracket Highlighting - Enable/Disable bracket highlighting in the global development environment.
|
Default: true
|
•
|
Bracket Highlight within Comments - Enable/Disable bracket highlighting within comments.
|
Default: false
|
•
|
Bracket Highlight within Strings - Enable/Disable bracket highlighting within comments.
|
Default: false
|
•
|
Enable Margin Marker - Enable/Disable margin marker to help show the location of offscreen matches.
|
Default: true
Smart Highlighting may be quickly enabled/disabled by checking/unchecking the following menu item from any browser's Option menu (Options | Code Assist | Smart Highlight)
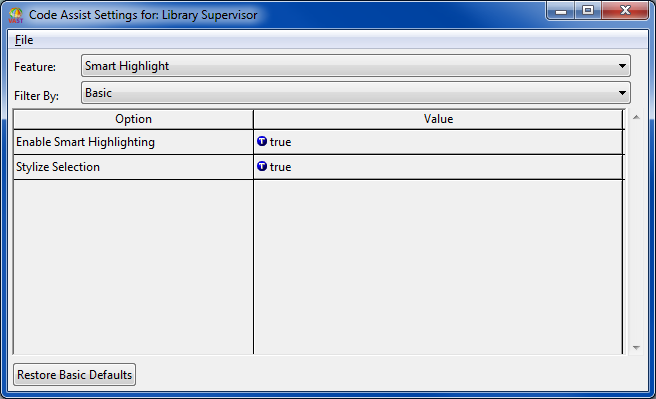
Smart Highlighting configuration options can be accessed by (Options | Code Assist | Configure...) in any browser menu and selecting "Smart Highlight" from the Feature combo box in the Configuration UI.
|
•
|
Enable Smart Highlighting - Enable/Disable smart highlighting in the global development environment.
|
Default: true
|
•
|
Stylize Selection - Apply stylization to the selected word, in addition to matched words. By default this is set to false which means that the selected word will retain the normal text selection color.
|
Default: false
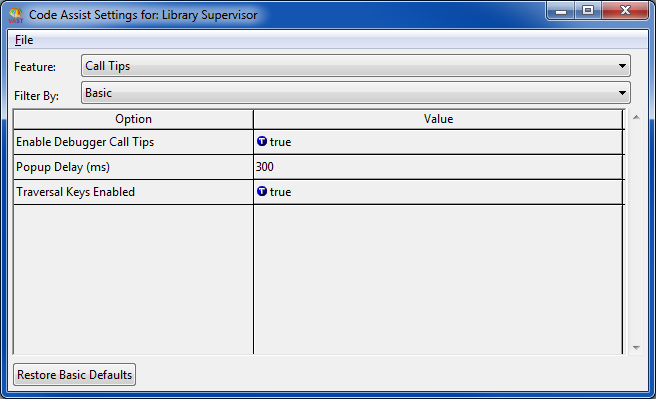
Call Tips configuration options can be accessed by (Options | Code Assist | Configure...) in any browser menu and selecting "Call Tips" from the Feature combo box in the Configuration UI.
|
•
|
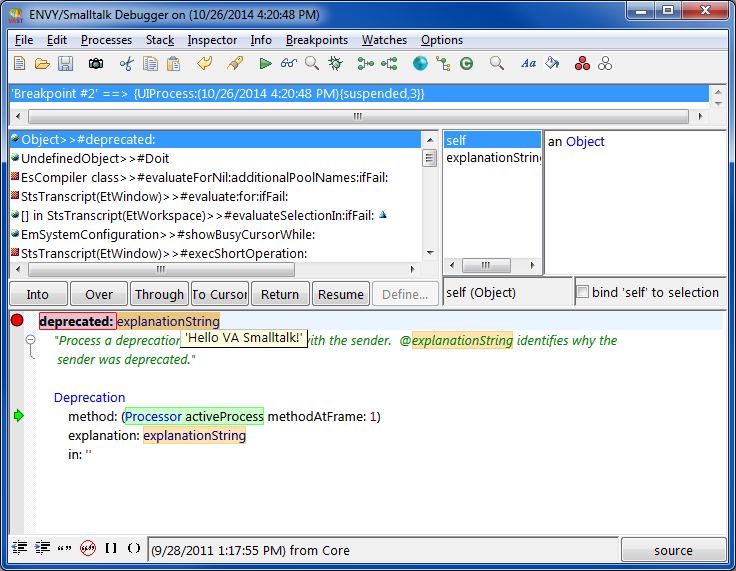
Enable Debugger Call Tips - Enable/Disable call tips in the global development environment. If enabled, call tips will be available during debugging sessions. Default: true
|
|
•
|
Popup Delay (ms) - Once the mouse cursor is positioned over a call tip region, this option defines the number of milliseconds to wait before call tips will show.
Default: 300 |
|
•
|
Traversal Keys Enabled - Used for action list calltips that mimic list widgets. If this is enabled, the the up/down arrows on the keyboard can be used to change the selected item within the calltip list. Pressing <Enter> will apply the selected item. Default: true
|
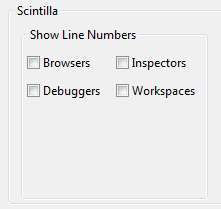
To enable/disable line numbers for one or more of the window types listed above, open the VA Assist Pro Setup dialog available from the Transcript's Tools menu (Tools | VA Assist Pro | Setup) and select the "General" tab. In the Scintilla section the user will find a sub-section named "Show Line Numbers". From this sub-section the user can specify the various window types that should show line numbers. Once an item is checked, the change will take place immediately.
A special margin, called the folding margin, exists on the left part of the editor. This margin shows a series of markers to indicate if the comment is expanded or collapsed. Code Folding may be quickly enabled/disabled by checking/unchecking the following menu item from any browser's Option menu (Options | Code Assist | Code Folding)
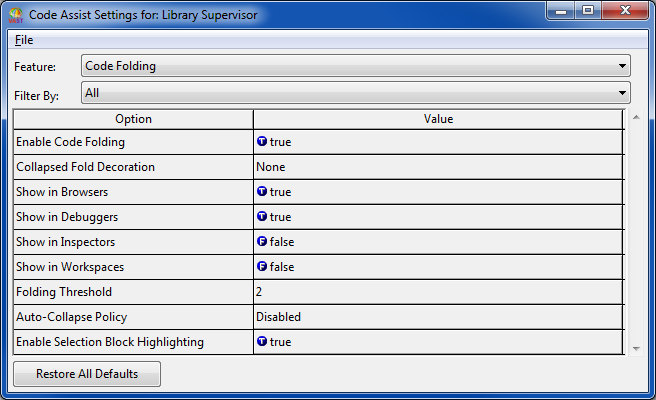
Code Folding configuration options can be accessed by (Options | Code Assist | Configure...) in any browser menu and selecting "Code Folding" from the Feature combo box in the Configuration UI.
|
•
|
|
•
|
Collapsed Fold Decoration - Visual indication used for folding areas that have been collapsed.
Default: None |
|
•
|
|
•
|
|
•
|
|
•
|
|
•
|
Folding Threshold - The number of lines in a multiline comment before folding will be applied. A threshold of 2 means all multiline comments will have folding applied. Default: 2
|
|
•
|
Auto-Collapse Policy - Policy to control which foldable comments are automatically collapsed when new content loads.
Default: Disabled |
|
•
|
Enable Selection Block Highlighting - Enable highlighting in the margin of the selected fold block.
Default: true |
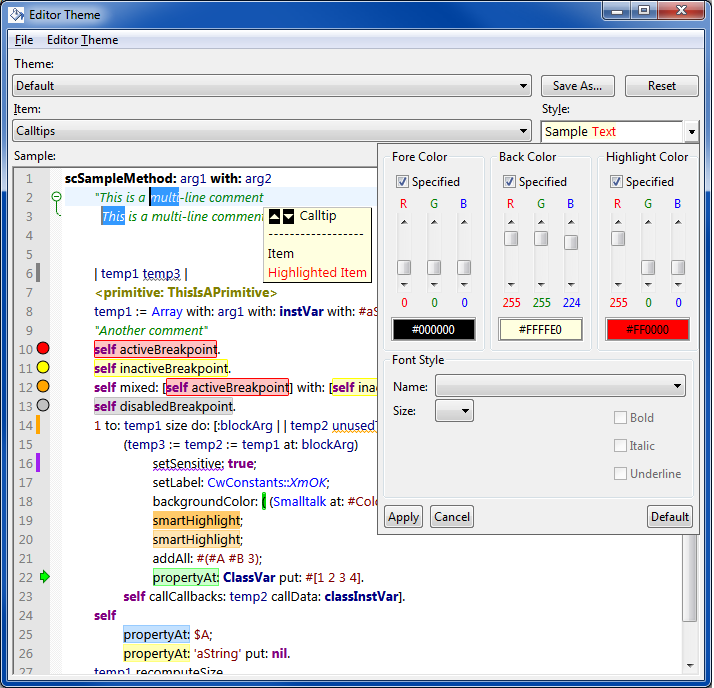
In order to facilitate the creation and modification of themes, a UI is available that allows the user to tweak any available theme setting. This UI can be accessed from the Options menu of any browser (Options | Editor Theme | Configure...).
There are a number of predefined themes to choose from. Once the Editor Theme UI is open, just change the theme from the Theme combobox. To make your own themes, simply choose one of the predefined themes, make your style changes, and press the Save As... button (to the right of the Theme combobox). This will allow you to name and save your new theme.
There are a large number of theme Items available. While you can look through all the choices from the Items combobox, it is far simpler to simply click on the visual item you wish to modify inside the sample editor. Doing so will automatically select it from the Items combobox.
Once an item is chosen, you will see a preview of it in the Style section of the UI (Below the Save As... and Reset button). Within this section is a dropdown arrow, which when clicked, will display a style customization panel that is unique to the item chosen. Depending on the item, you can tweak styles like foreground and background colors, fonts names and sizes and various transparency settings. The preview within the Style section will constantly update to show you what impact your setting changes are having.
|
•
|
Browsers - Code completion is available in many of the Smalltalk browsers. When browsing classes, implementors, senders and so on, these browsers contain state which code completion uses to derive the classes and methods that are visible. This is useful if you only want to see classes and methods visible in the prerequisite application chain.
|
|
•
|
Inspectors - Code completion hooks into the text editors available inside a VA Assist inspector. The code completion engine uses the additional runtime information available in an inspector to provide more accurate suggestions.
|
|
•
|
Workspaces - Workspaces don't have a sense of visibility in the same way browsers do. In workspaces, everything in the system is visible. The nice thing about VA Assist workspaces is that they maintain the values of evaluated variables that are defined. Code completion ties into this behavior, and will use the additional information to resolve the type of a variable.
|
|
•
|
Debuggers - Code completion even hooks into the debugger. In addition to all the capability provided by a general Smalltalk browser, code completion will use the runtime information available to resolve types of variables and arguments.
|
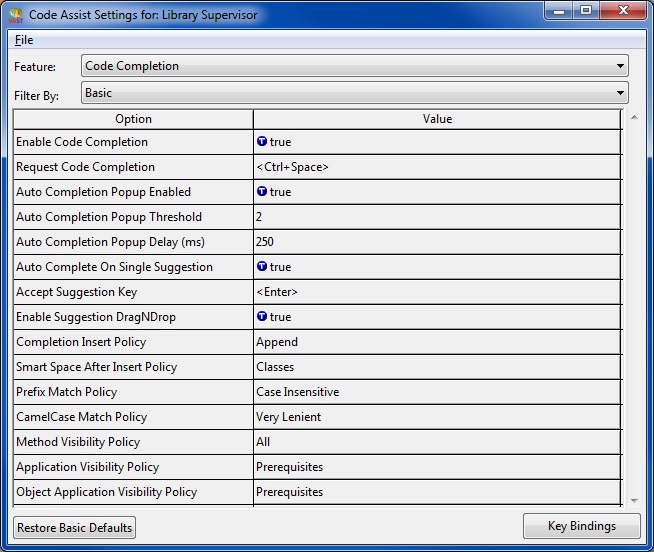
Code completion configuration options can be accessed by (Options | Code Assist | Configure...) in any browser menu and selecting "Code Completion" from the Feature combo box in the Configuration UI. Because there are so many available options that allow you to customize your experience using Code Completion, a Filter combo box has been provided that shows the various options in logical categories. A complete description of each configuration option will be provided below.
The configuration UI allows you to restore the default settings for the configuration items that are in view. This gives you the ability to restore just the settings in a particular category, without effecting the settings in other categories. If you would like to restore all settings, select the "All" category in the filter combo box and press the "Restore All Defaults" button on the bottom-left of the configuration UI.
The configuration UI allows you to restore the default settings for the configuration items that are in view. This gives you the ability to restore just the settings in a particular category, without effecting the settings in other categories. If you would like to restore all settings, select the "All" category in the filter combo box and press the "Restore All Defaults" button on the bottom-left of the configuration UI.
Tip: If you would like a reminder of what an option does, you can hover the mouse pointer over the option name and a tooltip will show with a brief description. AbtEwHoverHelp class must be loaded in the image for tooltip support.
|
•
|
|
•
|
Enable Suggestion DragNDrop - If set to true, then completion suggestions can be dragged out of the popup and dropped anywhere outside. In doing so, a relevant Smalltalk browser will be displayed where the drop occurred. The type of browser displayed will depend on the type of completion. If the <Ctrl> key is NOT held during the drop, then a Class/Implementors browser will be displayed for the suggestion. If the <Ctrl> key IS held during the drop, then a References/Senders browser will be displayed.
Default: true Note: Local Variable and Character completions do not support DragNDrop. |
|
•
|
Completion Insert Policy - The default policy to use when applying a completion to the text editor. Because there are only two policies, you may hold down the <Ctrl> key when applying a completion and the other (non-default) insert policy will be used instead.
|
|
•
|
Append - When a completion is applied, it is inserted at the cursor point without overwriting any of the characters after the cursor
|
|
•
|
Overwrite - When a completion is applied, it is inserted at the cursor point and will overwrite any additional characters after the cursor up to, what is perceived as, a word boundary.
|
Default: Append
|
•
|
Smart Space After Insert Policy - This policy describes the type of completions that should have a space appended to them when applied to the text editor. However, if it is found that an additional separator already exists after the insert point in the editor, then the additional space will not be appended. You can specify that this policy applies to any combination of Classes, Variables and Methods.
Default: Classes |
|
•
|
Prefix Match Policy - This policy describes how prefix matching is configured. Prefix matching algorithms will attempt to match the partial string in the text editor with the prefix of candidate completion suggestions according to the policies described below:
|
|
•
|
Disabled - Do not allow prefix matching
|
|
•
|
Case Sensitive - The characters in the partial string must exactly match (same case) the characters that make up the prefix of candidate completions.
|
|
•
|
Case Insensitive - The characters in the partial string must have a case-insensitive equivalence (same character) with the characters that make up the prefix of candidate completions.
|
Default: Case Insensitive
Tip: Why would you ever disable prefix matches? As you will see, code completion has support for other, often more powerful, types of match algorithms. Some developers may wish to only rely on code completion using non-prefix match algorithms. This has the effect of further reducing the overall number of suggestions in the completion popup, which is always a target goal.
|
•
|
CamelCase Match Policy - This policy describes how CamelCase matching is configured. CamelCase matching allows for a flexible way to filter completion suggestions by aligning the characters in the partial string with "camel humps" found in candidate completion strings. "Camel humps" are the uppercase characters in a camel-case name. For example, the letters 'O' and 'C' are "camel humps" in the method name "asOrderedCollection". One of many patterns to match this method name using camel-case matching would be the pattern "aOC". The CamelCase Matching algorithm is configured based on the policies described below.
|
|
•
|
Disabled - Do not allow camel-case matching
|
|
•
|
Very Strict - Uppercase characters in the partial string are REQUIRED to match "camel humps" in the candidate string. Furthermore, the number of "camel humps" in the partial string is REQUIRED to have the same number of "camel humps" in a given candidate completion.
Example: "ReadWriteStream" can be matched by typing "RWS", but not "rws" or "RW" |
|
•
|
Strict - Uppercase characters in the partial string are REQUIRED to match "camel humps" in the candidate string. However, the number of "camel humps" in the partial string is NOT REQUIRED to have the same number of "camel humps" in a given candidate completion.
Example: "ReadWriteStream" can be matched by typing "RW" or "ReWr", but not "rws" |
|
•
|
Lenient - Shiftless CamelCase. Uppercase characters in the partial string are NOT REQUIRED to match "camel humps" in the candidate string, though it must be the same letter (No shift required). Furthermore, the number of "camel humps" in the partial string is REQUIRED to have the same number of "camel humps" in a given candidate completion.
Example: "ReadWriteStream" can be matched by typing "rws", but not "rwri" |
|
•
|
Very Lenient - Shiftless CamelCase. Uppercase characters in the partial string are NOT REQUIRED to match "camel humps" in the candidate string, though it must be the same letter (No shift required). Furthermore, the number of "camel humps" in the partial string is NOT REQUIRED to have the same number of "camel humps" in a given candidate completion.
Example: "ReadWriteStream" can be matched with "rw", "rwri" or "rws" |
Default: Very Lenient
|
•
|
Method Visibility Policy - This policy describes which method suggestions should be shown based on their visibility (i.e. Public, Private or both (All)). This is only applicable when a method suggestion can be mapped to a single method.
Default: All Live Filtering Support: When the completion popup is visible, and showing public/private methods, you can press <Ctrl+Shift+P> to cycle through the various method visibility policies. When performing live filtering, adjustments to the policy will only be retained while the popup is visible. Once the popup is closed, the original policy defined by your configuration will be reinstated. |
|
•
|
Application Visibility Policy - This policy describes the application visibility rules to use when computing completion suggestions for the browsers and debuggers. This policy evaluates concepts such as prerequisite chains, and therefore will have no impact on what is shown in an inspector or workspace.
Because of the flexibility of Smalltalk browsers, answering a seemingly simple question such as "What applications can I see?" is actually non-trivial. A combination of methods, classes and applications currently selected in a browser is used to come up with an initial answer. However, the algorithm also detects to see if you're modifying just the body of a selected method, or the method signature as well. This information is used to assemble a prerequisite application chain. The algorithm tries to take the conservative approach and assemble the largest set of visible applications when faced with ambiguity. The prerequisite algorithm is mostly modeled after what would happen if you modify a method in a browser and pressed save. To get an idea of the ambiguity that exists, if showing inherited methods in a class hierarchy browser, and you completely rewrite the method signature and body of a selected inherited method, upon pressing "save" the browser will ask a series of questions about what object and application it should be saved to. The set of all visible applications should include all possibilities. The following is a description of the available policies: |
|
•
|
All - All Objects and Methods will be considered when computing completion suggestions.
|
|
•
|
Prerequisites - Only Objects and Methods that are perceived as being in the prerequisite chain will be available when computing completion suggestions.
|
Default: Prerequisites
Live Filtering Support: When the completion popup is visible in a browser or debugger, you can press <Ctrl+Shift+U> to cycle through the various application visibility policies. When performing live filtering, adjustments to the policy will only be retained while the popup is visible. Once the popup is closed, the original policy defined by your configuration will be reinstated.
Live Filtering Support: When the completion popup is visible in a browser or debugger, you can press <Ctrl+Shift+U> to cycle through the various application visibility policies. When performing live filtering, adjustments to the policy will only be retained while the popup is visible. Once the popup is closed, the original policy defined by your configuration will be reinstated.
|
•
|
Object Application Visibility Policy - This policy provides an additional refinement to prerequisite application visibilities, and therefore is only applicable if the "Application Visibility Policy" is set to prerequisites.
|
|
•
|
Prerequisites - This is the default policy, and has no perceivable impact since the "Application Visibility Policy" is also set to prerequisites.
|
|
•
|
Kernel Application and SubApplications - With this policy, method completions, whose defining class is Object, will be filtered out UNLESS the method is defined in Kernel or any of Kernel's SubApplications. In the interest of being pragmatic, method extensions to Object in, what is determined to be, the current root application will also be included.
|
Default: Prerequisites
Tip: When would you use this? Object has a lot of methods. If you are finding that the completion popup is being cluttered up with Object methods in your prerequisite chain that you don't generally use, try setting this option to "Kernel Application and SubApplications" to reduce the overall size of the completion list.
Tip: When would you use this? Object has a lot of methods. If you are finding that the completion popup is being cluttered up with Object methods in your prerequisite chain that you don't generally use, try setting this option to "Kernel Application and SubApplications" to reduce the overall size of the completion list.
|
•
|
AutoPopup Traversal Key Enabled - If set to false, and the completion popup is displayed automatically (i.e. "Auto Completion Popup Enabled" is set to true), then using the traversal keys (Up, Down, Left, Right Arrows, PageUp and PageDown) will force the popup to close, and those keys will perform their appropriate action in the text editor. In order to scroll through selections in the completion list, you may hold down the <Ctrl> key and press any of the traversal keys, except for Left and Right arrows, since <Ctrl-Left> and <Ctrl-Right> are reserved for cursor placement behavior in the text editors. This option will have no effect on completion popups that are shown in response to a user request
Default: true Tip: When would you use this? If you find that you generally only accept completions when they are at (or near) the top of the completion list (or you prefer to use a mouse click), and find it annoying that the traversal keys you meant for the editor are getting intercepted by the popup, then you may want to try setting this option to false. Remember that you can still select items in the popup using these keys...you just need to hold the <Ctrl> key down during the key press. |
|
•
|
AutoPopup Select First Suggestion - If set to false, and the completion popup is displayed automatically (i.e. "Auto Completion Popup Enabled" is true), then the completion popup will show with no pre-selected completion suggestion. You can press the Down arrow key to highlight the first suggestion. This option will have no effect on completion popups that are shown in response to a user request.
Default: true Tip: When would you use this? If you find that you like having the completion popup automatically show, but you feel strongly that pressing either <Enter> or <Tab> (depending on your "Accept Suggestion Key" setting) should actually be applied to the text editor until you're read to tell it otherwise, try setting this option to false. This means that there is one additional keystroke (Down arrow) to get an item selected, and at this point you can press your "Accept Suggestion Key". |
|
•
|
Wrap Completion Popup Selections - Wraps selections in the completion popup once the top or bottom of the list is reached.
Default: true |
|
•
|
Method Receiver Sort Policy - Because code completion considers all possible precedence levels when requesting completion of a partial method selector, you may see method suggestions in the popup with a left arrow or double left arrow icon.
Method suggestions with a single left arrow icon imply the suggestion is meant for an outer receiver 1 level out from the inner receiver. A completion suggestion with a double left arrow implies the completion is meant for the receiver 2 levels out from the inner receiver. The distinction is important because it makes auto-parentheses insertion an unambiguous operation. By selecting a given completion, you are simultaneously specifying the intended precedence level, and code completion will take care of where the parentheses, if any, should go. With this overview in mind, it is now appropriate to say that this policy describes the order in which method suggestions, with the various receiver levels, will be sorted in the completion popup. The following is a description of the policies available: |
Inner First - Method suggestions intended for the inner receiver will be sorted before method suggestions intended for any outer receivers.
Outer First - Method suggestions intended for the outer receivers will be sorted before method suggestions intended for the inner receiver.
Inner First Unless Binary Outer Exists - The preference here is to sort with an Inner First sort policy, unless the inner receiver is part of a (outer) binary expression, in which case an Outer First sort policy will be used.
Default: Inner First Unless Binary Outer Exists
Live Filtering Support: When the completion popup is visible in a workspace, inspector, browser or debugger, you can press <Ctrl+Shift+I> to cycle through the Inner/Outer First sort policies. When performing live filtering, adjustments to the policy will only be retained while the popup is visible. Once the popup is closed, the original policy defined by your configuration will be reinstated.
Tip: When would you use "Inner First Unless Binary Outer Exists"? While it would be difficult to formally prove, it was noticed that after requesting code completion after a binary expressions, such as "x = y", the completion suggestions of interest tended to be those that referred to the outer binary expression, rather than the inner receiver (which in this example is "y"). Of course, there are many cases where you actually want to refer to the inner receiver, and wish those would show first. If you find this to be universally true, you may adjust this sort policy to Inner First, or if it's just in a few cases, you can take advantage of live filtering and have it sorted the way you want by pressing the live filter hotkey described above.
|
•
|
Prefer Class Hierarchy Method Sort - If set to true, method completions for receivers, whose object type can be narrowed down to a single type, will be sorted in the popup according to the method's defining class position in the class hierarchy (ordered by most concrete to most abstract). A lexicographical sort is the standard sort policy used if not using a hierarchy sort.
Default: true Live Filtering Support: When the completion popup is visible in a workspace, inspector, browser or debugger, you can press <Ctrl+Shift+H> to toggle between hierarchy and lexicographical sort. This will have no effect if a hierarchy sort it not possible because the receiver's object type is not narrow enough. When performing live filtering, adjustments to this setting will only be retained while the popup is visible. Once the popup is closed, the original policy defined by your configuration will be reinstated. |
|
•
|
Enable Variable Completions - Allows you to control if completion suggestions for a variable will be shown in the completion popup.
Default: true |
|
•
|
Enable Pool Variable Completions - Allows you to control if completion suggestions for pool variables will be shown in the completion popup.
Default: true |
|
•
|
Enable Global Namespace Completions - Allows you to control if completion suggestions for global namespace items (Classes/Globals/Pool Dictionaries) will be shown in the completion popup.
Default: true |
|
•
|
Enable Symbol Completions - Allows you to control if completion suggestions for Symbols and Atoms will be shown in the completion popup.
Default: true |
|
•
|
Enable Method Completions - Allows you to control if completion suggestions for Methods will be shown in the completion popup.
Default: true |
|
•
|
Enable Block Argument Detection - If this is set to true, then the code completion engine will attempt to identify block-arguments of a keyword method completion suggestion. If any are found, "[]" will be inserted in their associated argument positions once the completion suggestion is applied to the text editor.
Default: true |
|
•
|
Apply Filters to Empty Partials - If this is set to true, then a single suggestion will show when requesting code completion on an empty partial. This suggestion acts as a filter so huge quantities of suggestions are not drawn which is performance intensive. Accepting this filter suggestion will simply redraw all suggestions.
Default: true |
The options in this category provide settings to customize the look and feel of code completion. With these settings, you can create a customized theme for the completion popup, as well as take advantage of match highlighting.
Being able to control the visual appearance of the completion popup can have a lot of appeal. However, we felt it was also important to find ways to use visual appearance to help increase the usability of code completion. With this in mind, code completion offers a "Match Highlighting" engine that provides visual cues for matched and unmatched regions of a candidate completion suggestion in the popup. These visual cues allow you to quickly see why completions are in the popup, what the next character to press should be and what remaining portion of a given completion in the popup has yet to be matched.
Note: Match Highlighting functionality is only available when using enhanced list widgets with the extended list widget style, which is one of the settings provided. However, some of the basic theme settings will still be available even when you're not using enhanced list widgets.
Note: Match Highlighting functionality is only available when using enhanced list widgets with the extended list widget style, which is one of the settings provided. However, some of the basic theme settings will still be available even when you're not using enhanced list widgets.
|
•
|
Use Enhanced List Widgets - Controls if the code completion widgets will be using enhanced list widgets. Enhanced list widgets will always be available for use because they are a core part of the development environment (ExtendedWidgets). The fundamental reason this choice was made available is that, by default, code completion tries to maintain the look and feel of the VA Smalltalk environment. If the development environment is not using enhanced list widgets, then by default, neither will code completion. This setting is provided so you are free to override whatever the default is.
|
|
•
|
Default - Defers to the global setting of the environment "Use Enhanced List Widgets" to determine if enhanced list widgets should be enabled.
|
|
•
|
true - Use enhanced list widgets
|
|
•
|
false - Do not use enhanced list widgets
|
Default: Default
|
•
|
Enhanced List Widget Style - The code completion list widget style to use.
|
|
•
|
Extended - Completion list widget is drawn using VA Smalltalk's Extended Widget's framework
|
|
•
|
Scintilla - Completion list widget is drawn and managed by Scintilla.
|
|
•
|
Max Visible Suggestions - The maximum number of visible suggestions to display in the completion popup. This effectively determines the height of the popup and will be constrained by the overall height of the screen.
Default: 10 |
|
•
|
Completion Popup Layout Policy - This policy describes the placement of the completion popup.
|
|
•
|
Align with Text - When the completion popup is shown, it will anchor itself to the starting location of the partial string the user has entered. Even as the user types additional characters, the popup will maintain its initial location.
|
|
•
|
Align with Cursor - When the completion popup is shown, it will show relative to the cursor's current location. As the cursor moves, the completion popup will move with it.
|
Default: Align with Text
|
•
|
Completion Popup Font - The font used for completion suggestions that are rendered in the popup, unless overridden with matched/unmatched region font settings. If "Default" is specified, then the text editor font will be used.
Default: Default |
|
•
|
Completion Popup Background - The background color used for the completion popup (non-selected region). The default color will be the enhanced list widgets color defined for the system by VA Assist Pro. If this is not set, then the default background will be white.
Default: Default |
|
•
|
Completion Popup Foreground - The foreground color used for the completion popup (non-selected region). The default color will be the computed inverse of the "Completion Popup Background" color.
Default: Default |
|
•
|
Selected Suggestion Background - The background color used for a selected suggestion in the completion popup. The default color will be the selected background color defined by the system. (see CwList>>selectionBackgroundColor)
Default: Default |
|
•
|
Selected Suggestion Foreground - The foreground color used for a selected suggestion in the completion popup. The default color will be the selected foreground color defined by the system (see CwList>>selectionForegroundColor)
Default: Default |
|
•
|
Enable Match Highlighting - If set to true, then completion suggestions rendered in the popup will be stylized according to the settings described below.
Default: Default |
|
•
|
Matched Region Font - The font used for regions of a completion suggestions that match the current partial string in the text editor. If "Default" is specified, then the "Completion Popup Font" will be used.
Default: Default |
|
•
|
Matched Region Color - The color used for regions of an unselected completion suggestion that matches the current partial string in the text editor. If "Default" is specified, then the "Completion Popup Foreground" color will be used.
Default: Default |
|
•
|
Selected Matched Region Color - The color used for regions of a selected completion suggestion that matches the current partial string in the text editor. If "Default" is specified, then the "Selected Suggestion Foreground" color will be used.
Default: Default |
|
•
|
Unmatched Region Font - The font used for regions of a completion suggestions that have yet to matched by the partial string pattern. If "Default" is specified, then the "Completion Popup Font" will be used.
Default: Default |
|
•
|
Unmatched Region Color - The color used for regions of an unselected completion suggestion that are still unmatched by the current partial string in the text editor. If "Default" is specified, then the "Completion Popup Foreground" color will be used.
Default: Default |
|
•
|
Selected Unmatched Region Color - The color used for regions of a selected completion suggestion that are still unmatched by the current partial string in the text editor. If "Default" is specified, then the "Selected Suggestion Foreground" color will be used.
Default: Default |
|
•
|
Highlight Distinct Matched Regions - If set to true, then matched regions in a completion suggestion will be highlighted independently of each other. This can be a useful visual cue to show completions that have been prefix or camel-case matched. If set to false, then all the matched regions will be combined into one contiguous match region.
Default: false |
|
•
|
Highlight Next Character To Match - If set to true, then an underline will be rendered under the next character to match in a given completion suggestion. This could also be interpreted as underlining the first unmatched character in a given completion suggestion.
Default: true |
|
•
|
|
|
•
|
|
|
•
|
|
•
|
|
|
•
|
|
Symbol Suggestions: VA Smalltalk's code completion has support for completing symbol literals. Suggestions for symbol literals are created from the Smalltalk symbol table, which is often very large. While code completion is more than happy to show you all symbols available in the system, you should understand that this is a pretty expensive operation and will take some time (which implies a second or so, instead of 100 milliseconds). You can see all symbols in the system by typing '#' and requesting code completion. You will notice that a filter notice will popup. At this point all the symbol suggestions have been prepared, they just have not been rendered in the popup yet. You may either accept the filter notice to show them in the completion popup, or you can just continue to type and it will filter on the prepared items and show the filtered suggestions in the completion popup.
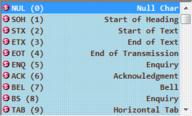
Character Literal Suggestions: One of the goals of code completion is to show useful information in the completion popup at all points. While you certainly don't need assistance in typing a single character, it may be useful for you to see a set of suggestions that describes the ASCII table. This can be achieved by typing '$' followed by a request for code completion. What you will be looking at is the non-extended ASCII table, in suggestion form, and you will be able to search by name or ASCII value. This is also helpful for completing some of the non-printable characters, which are usually referenced by pool variables. Code completion is aware of what pool variables are visible in your current context and will provide a full scoped reference to a character pool variable if necessary. The following shows an example of what character literal suggestions look like.
Method Suggestions: Code completion has a unique ability to display suggestions for all possible receivers of a method. Visual cues are provided in the completion popup that allow you to tell which receiver a completion suggestion refers to. Once a method suggestion is accepted, code completion will not only apply the completion to the editor, but also auto-insert parentheses where needed. Code completion is able to do this because the selection you make tells it what the intended precedence level is, and therefore where parentheses need to be inserted so the completion will refer to the intended receiver. The following picture below shows an example of the completion popup containing method suggestions for all three precedence levels to complete the partial 'aft'. The first suggestion is a camel-case match that refers to the variable receiver 'max'. The second suggestion is a camel-case match that refers to the binary expression receiver 'min < max'. We know this because there is one yellow left arrow icon to indicate that this completion is for the receiver one level out. Finally, we have two prefix-matched suggestions that refer to the receiver 'OrderedCollection new'. Notice that there are two yellow left arrows for these suggestions, which specifies that it is intended for the receiver two levels out.
Text Manipulation Suggestions: Some other VA Assist Pro features, such as refactoring, hook into code completion which can make it easier to initiate the refactoring. Some examples of this are generating accessors and declaring an undefined temporary. These are discussed in more detail in the Refactoring section below.
A key point to understand is that the partial string represents a pattern, and it is up to the matching algorithms to understand how to interpret that pattern. Most developers who have used code completion with other development environments are pretty comfortable with the fact that the partial string typically represents the prefix of the intended completion. So for example, if a developer wanted to complete the name 'OrderedCollection', they may type 'Ord' and request code completion with the expectation that 'OrderedCollection' will be an available candidate completion (and therefore will be an item in the completion popup). While this remains true, we will also see that VA Smalltalk has matching algorithms that interpret the partial string as a pattern that describes more than just the prefix of an intended completion. This leads to more powerful searching capabilities, but these matching algorithms have their own rules which you must learn in order to use them most effectively.
Prefix Matching: Prefix matching implies that the partial string represents the prefix of an intended completion. Therefore, the candidate completions that are successfully matched using this method will have the partial string as their prefix.
CamelCase Matching: VA Smalltalk supports a powerful multi-mode algorithm that interprets the partial string as a pattern which can be used to match names that conform to the rules of camel case. The camel case rule set is only loosely-defined, but fairly easy to understand with some examples which will be provided. The algorithm has a few modes which can be decided by you. See the 'CamelCase Match Policy' configuration section for more information.
CamelCasing is a way to represent multiple words or phrases as a single word. This is done by removing the spaces between the discrete words, which joins them together, and then taking the first letter from each word and making it an uppercase. This last step is so you can visually tell the separation between the words since spaces are no longer present. This is far easier to describe with some simple examples, and if you program in Smalltalk, you are probably very comfortable with this concept already. Consider the Smalltalk class name 'OrderedCollection'. In this example, the adjective 'Ordered' has been joined with the noun 'Collection'. Notice that the 'C' in 'Collection' is uppercase. This uppercase character is often referred to as a 'Camel hump' in a CamelCase name. These 'Camel humps' are used as part of the partial string to specify to the algorithm that if a prefix match fails at a certain character, then jump to the next 'Camel hump' and try to continue from there. Lets look at some examples. On the left will be the pattern, or the partial string that the user has typed into the text editor. On the right will be one potential candidate string that could match the pattern:
|
•
|
OrdCol -> OrderedCollection
|
|
•
|
OC -> OrderedCollection
|
|
•
|
|
•
|
mVar -> myVariable
|
|
•
|
ordcol -> OrderedCollection
|
|
•
|
oc -> OrderedCollection
|
|
•
|
|
•
|
mvar -> myVariable
|
|
•
|
|
•
|
|
•
|
|
•
|
|
•
|
Deactivating breakpoints can be accomplished through context-menus, or the user can simply double-click a breakpoint icon while holding the <Shift> key down.
VA Assist Pro provides a sophisticated code analytics engine, which is designed to Detect, Report and Repair issues with source code. Furthermore, the code analytics engine is designed to run in real time, constantly analyzing the code in the background as the user types.
|
•
|
Disabled - The rule will be skipped
|
|
•
|
Fatal Error - Highest Severity. An example of this is a compiler error.
|
|
•
|
Error - High Severity. An example of this is an unknown selector that is saved into a method. The method can still be saved, but it is usually a good indication that something is wrong.
|
|
•
|
Warning - Medium Severity. An example is a variable whose value is read before it has been assigned to. Unassigned variables are implicitly nil so it's not an error, but it is probably a good indication that something is amiss.
|
|
•
|
Info - Low Severity. An example is a variable that could be pushed to an inner scope.
|
|
•
|
Compiler Error - An error within the source that keeps it from compiling. Classification: Fatal Error
|
|
•
|
Unimplemented method in system - A selector referenced within the code is not implemented in the image. This could be because the appropriate code is not loaded or it may be a spelling mistake. Classification: Error
|
|
•
|
Unimplemented method in receiver - A message selector exists in the image, but it has been determined that the receiver of the message does not implement it. Classification: Error
|
|
•
|
Class/Method not visible in application - A reference to a class or a message selector is not visible in the application prerequisite chain. This can cause errors when packaging because the packager relies heavily on the prerequisite chain to know what can be stripped out of a reduced image. This is also an early warning sign of a disorganized code base. Classification: Warning
|
|
•
|
|
•
|
Variable read before written - The value of a variable is read before it is ever assigned to. Classification: Warning
|
|
•
|
Variable written but never read - A variable is assigned a value (or multiple values) but the value is never used. Classification: Warning
|
|
•
|
Variable can be pushed to inner scope - A variable could be defined in a more local scope. Classification: Info
|
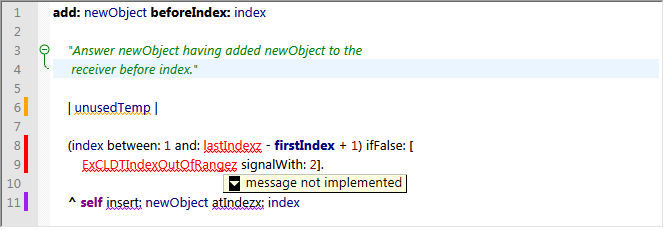
While indicator visualizations show where an issue exists, it does not detail what the issue is. Calltips are used to do this. The developer simply hovers the mouse pointer over an indicator for a short period of time (@300ms) and a calltip will appear with a short description of the issue.
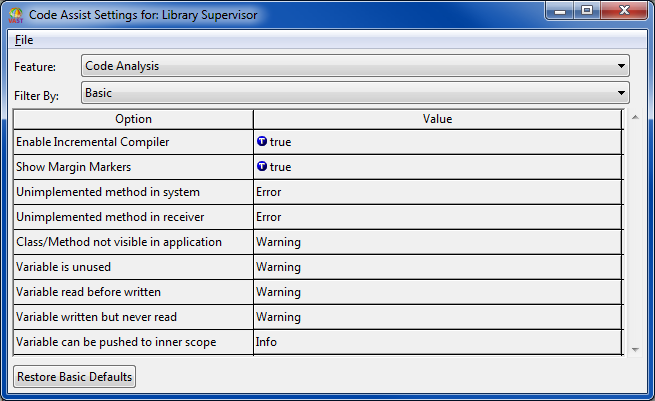
Code Analysis configuration options can be accessed by (Options | Code Assist | Configure...) in any browser menu and selecting "Code Analysis" from the Feature combo box in the Configuration UI.
|
•
|
|
•
|
Show Margin Markers - Enable/Disable the use of markers in the margin to indicate annotated source.
Default: true |
|
•
|
Unimplemented method in system - Classification of lint rule that detects if a selector is implemented anywhere in the image.
Default: Error |
|
•
|
Unimplemented method in receiver - Classification of lint rule that detects if a selector is implemented by the receiver.
Default: Error |
|
•
|
Class/Method not visible in application - Classification of lint rule that checks the prerequisite visibility of references to classes and message sends.
Default: Warning |
|
•
|
Variable is unused - Classification of lint rule that checks for declared temporaries that are never referenced.
Default: Warning |
|
•
|
Variable is read before written - Classification of lint rule that checks for variables whose value is read before an assignment occurs.
Default: Warning |
|
•
|
Variable is written but never read - Classification of lint rule that checks for variables that are assigned values but are never used.
Default: Warning |
|
•
|
Variable can be pushed to inner scope - Classification of lint rule that checks for variables that could be defined in a more local scope.
Default: Info |
|
•
|
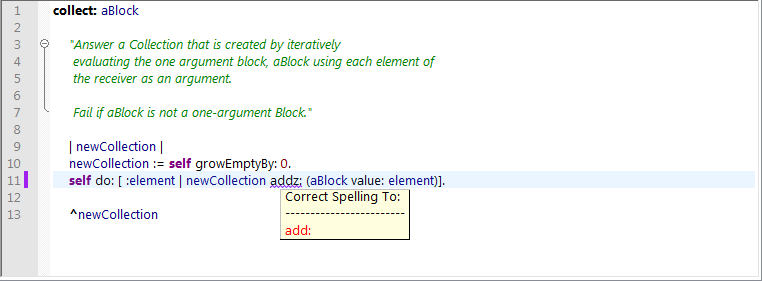
Action List Calltip: This is the repair for an "message not implemented" report.
|
|
•
|
Menu Item: Place the text cursor on the message selector that you want to correct. Bring up a context menu and activate "Correct Spelling" (Content Menu | Correct Spelling)
|
|
•
|
|
•
|
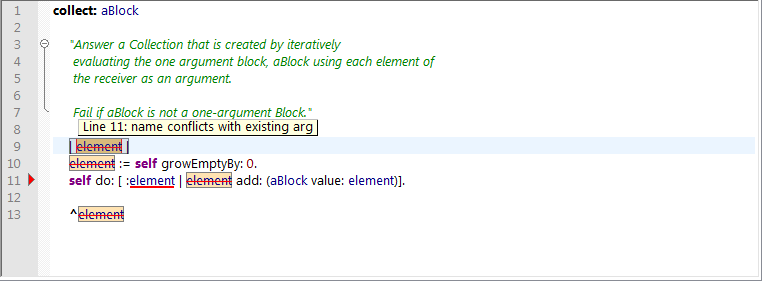
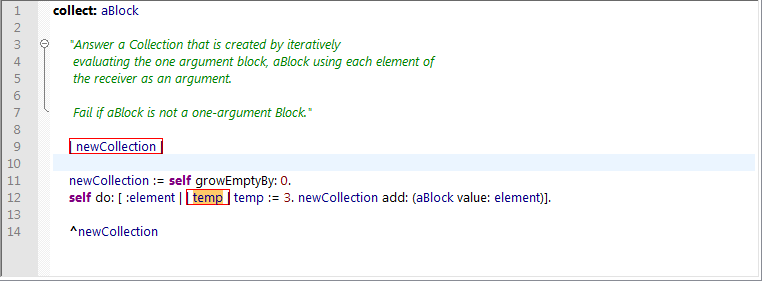
Menu Item: Place the text cursor on the temporary that you want to rename, it is not necessary to select the temporary. Bring up a context menu and activate "Instant Rename" (Content Menu | Refactoring | Instant Rename)
|
|
•
|
Shortcut: Place the text cursor on the temporary that you want to rename, it is not necessary to select the temporary. Press the "Instant Rename" shortcut <Ctrl+Alt+R>
|
|
•
|
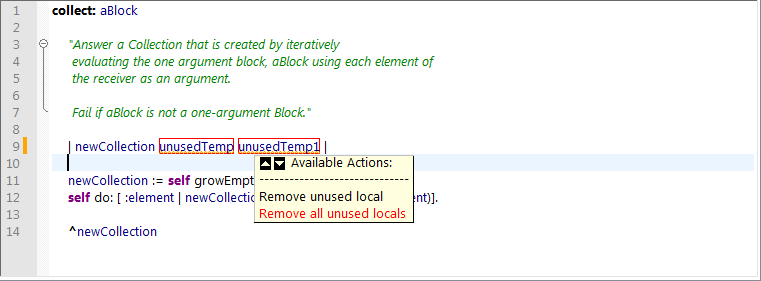
Action List Calltip: This is the repair for an "unused local" report
|
|
•
|
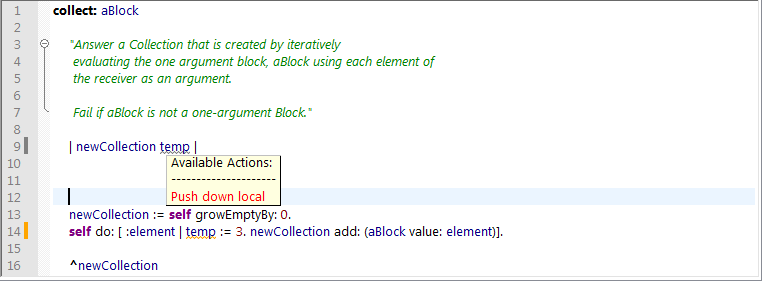
Action List Calltip: This is the repair for a "local can be pushed to inner scope" report.
|
|
•
|
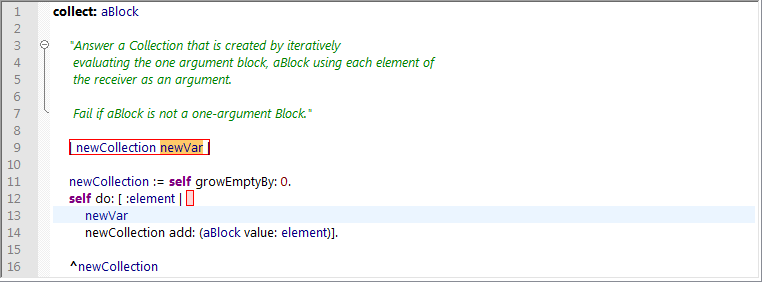
Menu Item: Place the text cursor on the temporary that you want to declare, it is not necessary to select the temporary. Bring up a context menu and activate "Instant Rename" (Content Menu | Refactoring | Declare Temporary Variable)
|
|
•
|
Shortcut: Place the text cursor on the temporary that you want to rename, it is not necessary to select the temporary. Press the "Instant Rename" shortcut <Ctrl+Alt+D>
|
|
•
|
|
•
|
Code Completion: Request code completion after the undefined token. This will show a suggestion that asked if you want to declare as a temporary variable. Press Enter to accept
|
|
•
|
(Application Manager, Configuration Maps Browser, Application Editions Browser)
