Creating a New Environment
To create a new environment, press the  in the upper left corner of the main Environments list panel.
 in the upper left corner of the main Environments list panel.
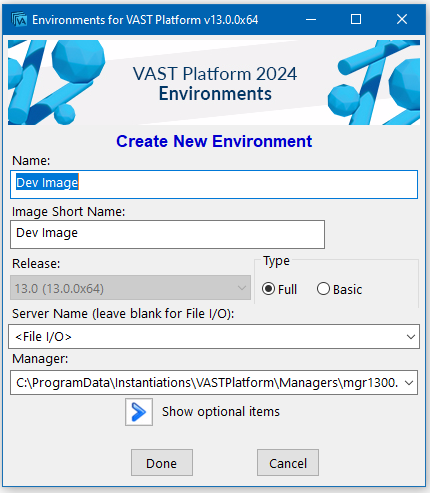
“Create New Environment” Panel
Select a name for your environment -- this name will appear in the main Environments list panel and will also be the name of the subdirectory created under the Root Development Environments Folder.
Note
The Release drop-down list contains a list of VAST releases available to Environments. The list is sorted from newest to oldest release, with the default selection being the newest available release.
Select whether you want a Full (VA Smalltalk) or Basic (IBMST) development environment -- nearly all the time you will want full so you have access to all the development tools.
Configure how you want access the library: either File I/O or EMSRV. Environments will suggest default values based on the settings found in the abt.ini file located in the newimage folder of your VAST Client installation. Leave the Server Name blank for File I/O. To run with EMSRV, enter the server name the library resides on or localhost if the library resides on the same machine as Environments. For either configuration, specify the full path to the library you want this environment to access when you start up its image.
That’s all you need to create an environment.
If you want, you can set more properties in the environment.
When you press Done, Environments will navigate to the Main Environments list panel with your newly created environment in the list.
Last modified date: 02/20/2024