Step 2: Add parts to AlarmClockView


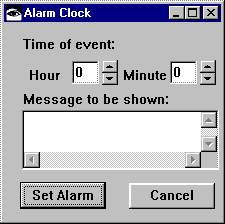
When completed, AlarmClockView has the following user interface:


To define this user interface, first, add two push buttons to the empty window in the Composition Editor:
1. Select  (Buttons category) and
  (Push Button part) from the parts palette. After you select them, the status line along the bottom of the editor shows:
 (Buttons category) and
  (Push Button part) from the parts palette. After you select them, the status line along the bottom of the editor shows:
 Category: Buttons Part: Push Button
2. Click on the Sticky checkbox in the lower left of the editor so it shows a check mark. You now can add multiple push buttons to the empty window without having to select the Push Button part again.
3. Click on the lower-left and then on the lower-right of the window. This adds the push buttons.


4. Click on  (the Selection tool) on the Tool bar to disarm the Sticky.
 (the Selection tool) on the Tool bar to disarm the Sticky.
 Next, add the other parts. You'll need:
Parts to add
Where they are in the parts palette
1 Multi-line Edit
 category,
  part
part 4 Labels
 category,
  part
part 2 Spin Buttons
 category,
  part
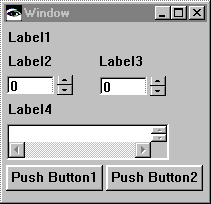
part After you add the parts, the window resembles:


Last modified date: 08/01/2019